
This is the fourth part of a series. You may find the beginning here: Low Poly Tutorials.

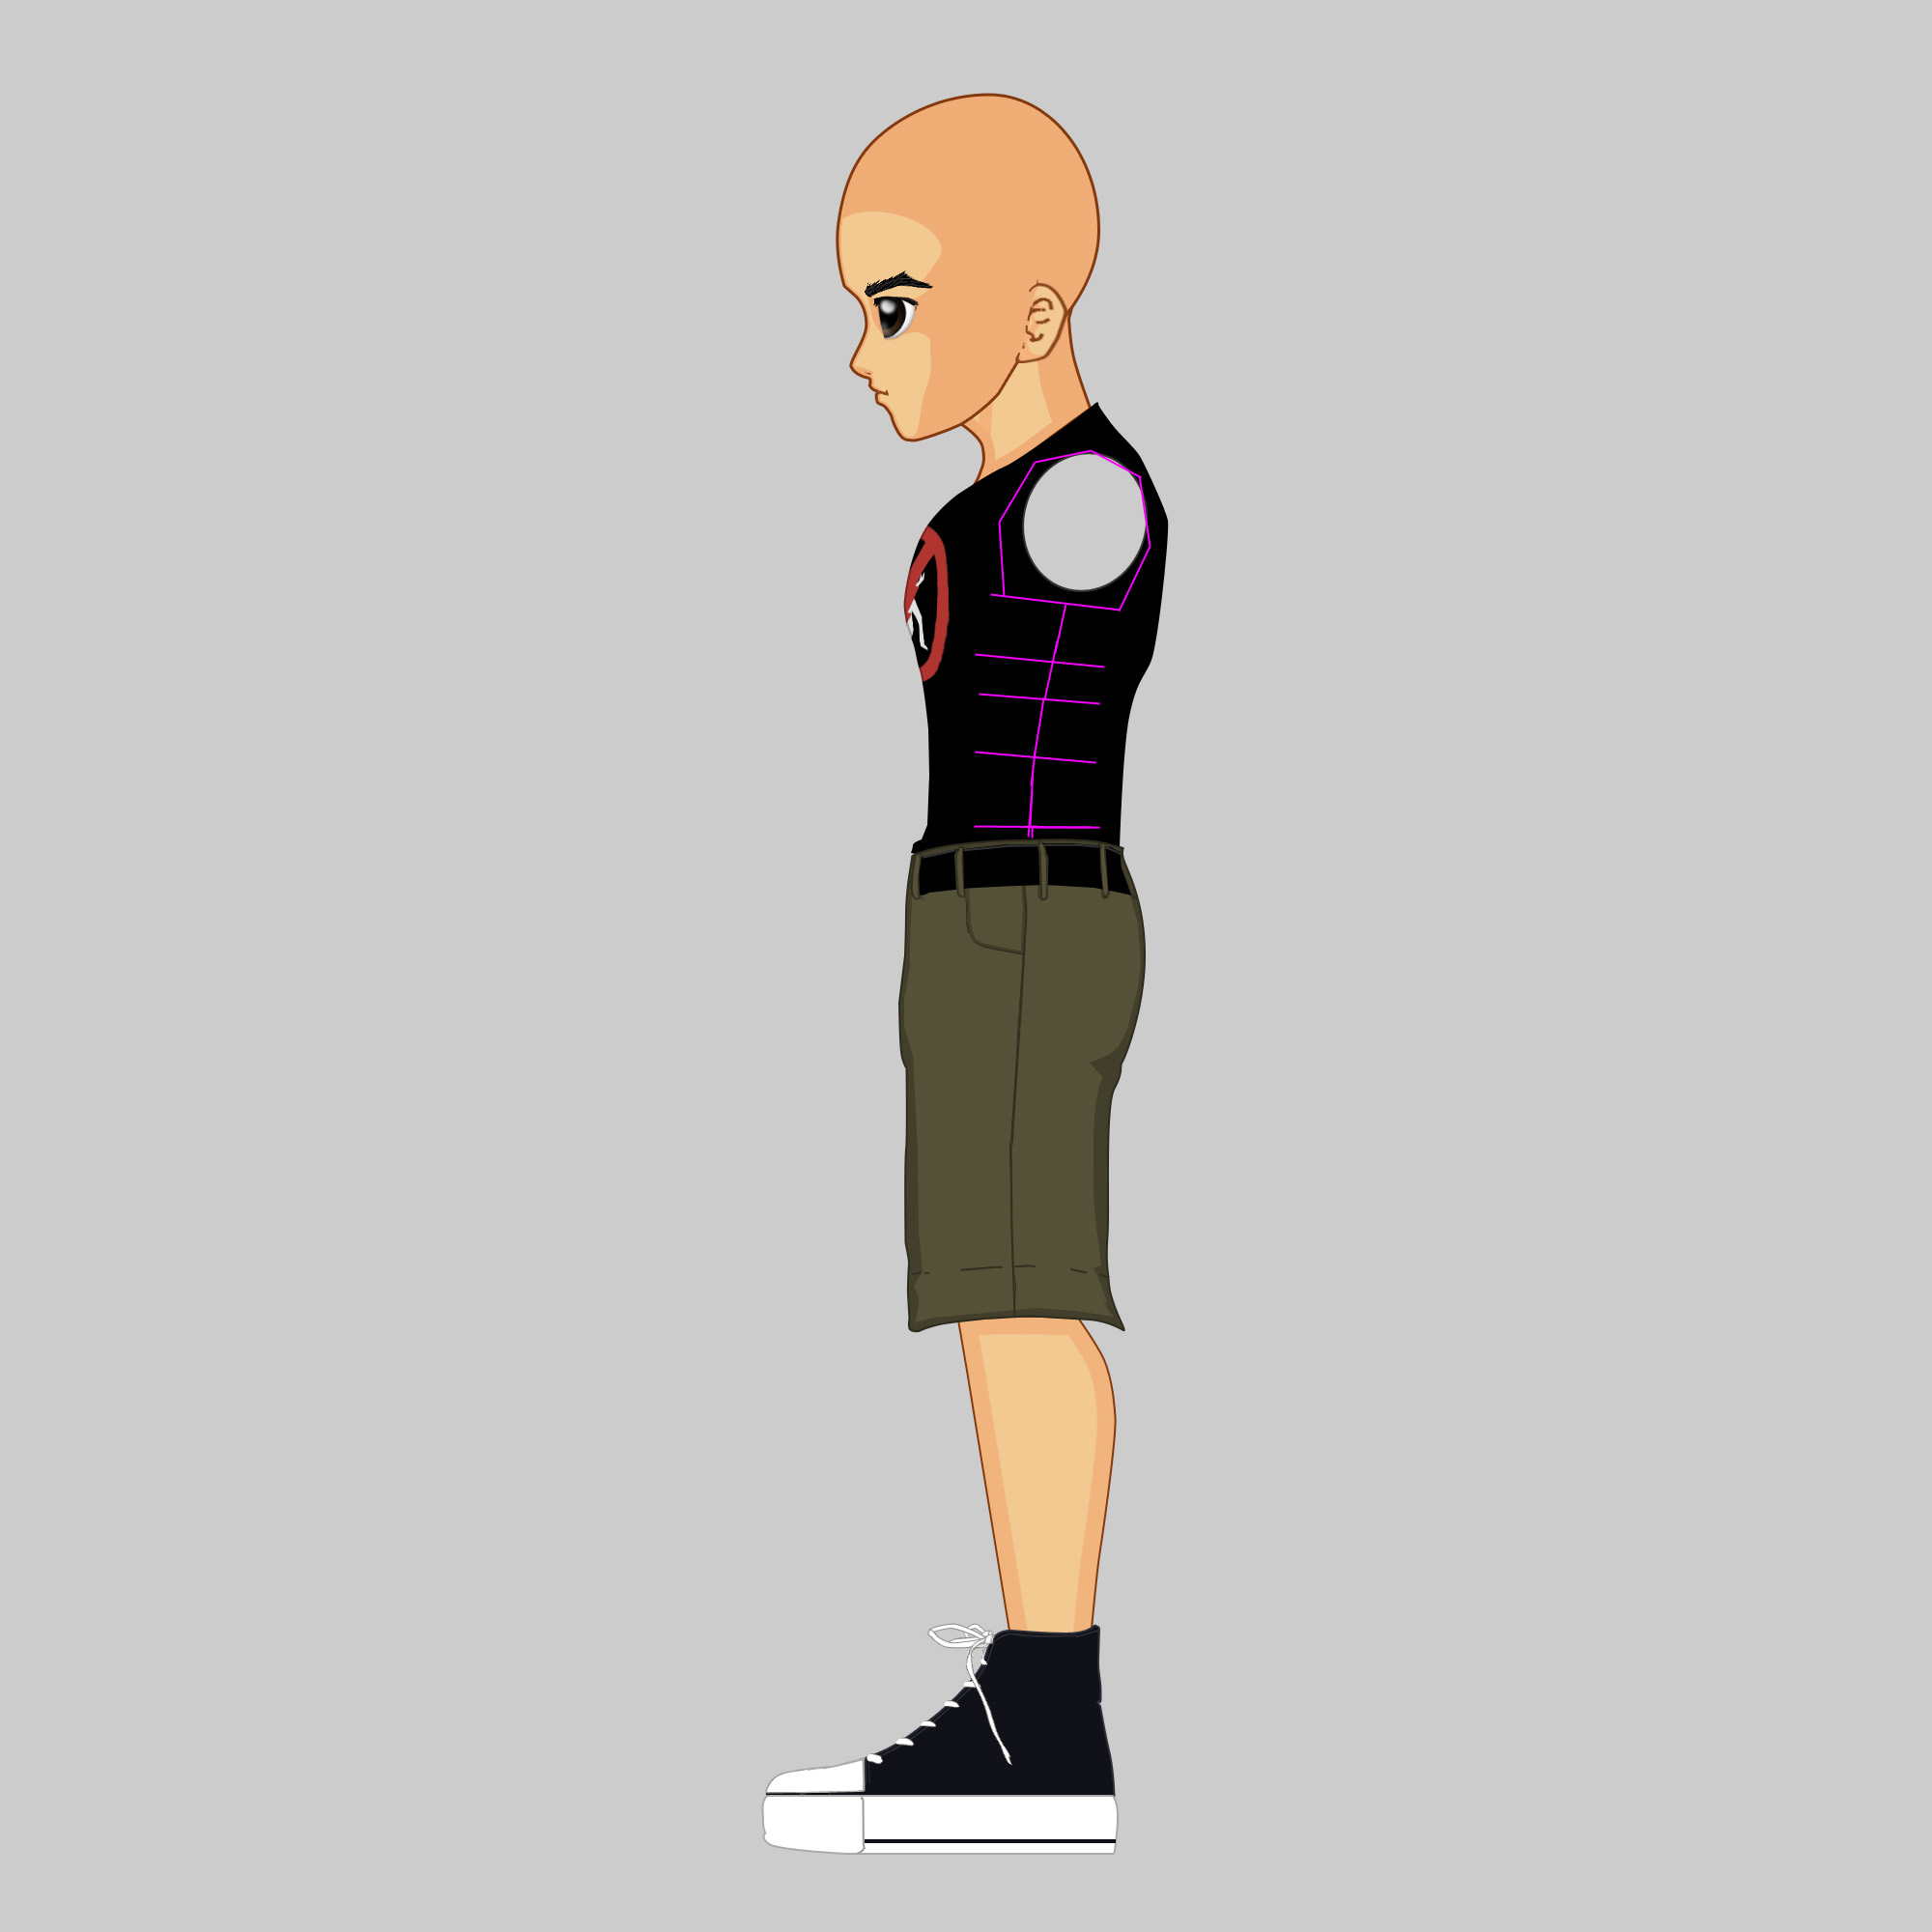
Here's a preview of the textured model (before rigging optimization). With minimal improvisation, you should have all the skills required to complete the rest of the main body on your own. Don't expect anything new in this section, we will mostly be using everything we learned before and deal mostly with how to approach tricky areas like the arm sockets or the collar.
Just a heads-up: We will be going back through the legs to make some adjustments to the alignment of some edges/vertices. The reason why will become clear as we build the torso and flaws in our design are revealed. Throughout this whole tutorial, I will be making some micro-calibrations (adjustments here and there), because of the organic shape of the torso. It won't be as straightforward as the shoe, leg, and shorts in previous tutorials.

Here is an outline of what we will do. Starting from the belt-line, we are going to extrude up a few times, aligning with the reference images as we go until we reach just under the armpits. With the abdominal area and lower back created, we will see some square angles on our body, which will need to be pulled in to create a rounder transition on the side of the body. We will do this to the legs too, so we don't have any pointy and overly-boxy corners. With the abdominal area created, we will begin extruding part of it up to create a tank top shape representing the pectorals, collar, and upper back. This will leave nicely shaped sockets for the arms and neck.
Alternatively, if you're not a fan of reading tutorials, you can once again just follow along with the video version to see it done in real-time, but with the usual trade-off of it being accompanied by unscripted and flustered commentary =P.
The Lower Torso

From there, we want to extrude the edge up in order to create the bottom of the shirt according to the image on the right. This is decadent for low poly, but I want to emphasize the shape. Take note of how useful the guides on the shirt are.

As we continue on extruding up, remember to scale and move the edges to line up with the reference images, just like in the image above. We're going to repeat this step 4 more times, but also rotate the edges to line up with the pink sketch marks I added. See the four steps illustrated below!

1. Lower Abs

2. Mid Abs

3. Upper Abs

4. Bottom Pectorals/Ribcage
When doing the above steps, also make sure to follow along with the front reference image as well to make sure it lines up properly.

Looking at the image above, this should be the current status of your model. Notice how the frontside of our model is starting to look a bit flat and blocky. This is because, while we've been aligning the contours of our image, we haven't properly aligned the edges and points inside of the model. With that, we're going to start pulling all of those points inwards to create a rounder shape. This requires a bit of intuition and critical thinking, though on reference images with more detail, it's not so bad.

Start by selecting the vertices on the hard corners of the model and begin moving them inwards to round out the abdomen and lower back. They should resemble the captures below. Also take care that the curve from point to point creates a good arc.


If at any point I lost you in the last few steps in rounding out the torso, remember you can always view the YouTube video. This link will jump you to the right part of the video.
Hopefully you're still on track after that freestyle rounding, because you're about to do it again.

Immediately after the changes are made to our torso, we can see just how OFF the shorts are. We never tightened them up in the last tutorial, an oversight on my part, but it's nothing we can't fix now. You can start with the easiest bit which is lining up the side vertices with the seam on the main character's shorts. See the image above.

You'll want to continue on and pull in those corners until they're nice and round, creating a more natural look to the legs. While we're working in low poly, we don't want our main character looking like a crude robot. Don't smooth it out too much either. The image below should act as a decent target for your smoothing efforts.

If you liked it boxier, feel free to push them whichever way you wish and make adjustments as you see fit. Also... don't forget to SAVE since we made a lot of important additions/changes to our model.
Tweaking The Abdomen
Going by the new sketch marks added to the side-image, we're going to have to do some more adjustments to the torso so we can preserve the arm socket. This is just the way I'm doing it for a low poly model, though in reality, the arm works nothing like that except on an action figure =P.
On the side image, pull the points in to line up with the base of the arm socket, just like in the image above. Then continue the curve downwards.
This will make the torso look awkward, because as we pull them back, it flattens the torso too much and creates an ellipse.

To counteract the problem caused in the previous step, we have to widen the same points according to the front profile, which will add more volume to the torso. If you're freestyling another model and having issues with your model not looking filled-out properly, you might want to try working with primitive nurb shapes to create the general form of your character and then poly modeling around it like paper mache (Papier-mâché).

Yes, there are a lot of micro-calibrations (tweaks) we're making to our model this time around. With that, you should have something that looks like the image above. If you feel my shape is off, feel free to make any corrections on your own later, but for now, wait until I make one more change to the sides of the body.

Because the armpit will need to bend down, and our model won't be having loose clothing on its body, we need to tighten up the shirt a bit to compensate for future rigging. This will also affect the shape of the torso, so that's why I wanted you to wait before making more tweaks to the shape.

You should also widen the ab area some more according to the image above. We're doing this to average the distribution of quads a bit more, while also helping to improve the shape of the character.

Do the same for the back.

You show now have something that looks like the image above. If you've gotten this far and you're an absolute beginner, congratulate yourself because I've been very vague in my descriptions of how to achieve things in this tutorial. Very little changed in this particular section, but they were necessary changes. This series of low poly tutorials are ones with escalating complexity and we don't want to go into too much detail explaining how to do things in earlier sessions. Go ahead and save and we'll finish off the rest of the torso.
The Chest

Continuing this shape, let's select the edges highlighted in the image above. Instead of continuing to extrude the whole border edge upwards, we're now going to finish off this shape by attempting to create what will resemble a tank top (or breastplate) by extruding and joining only part of the edge.

The above animation shows some rapid socket creation via Extrude and Move Tool. We're just extruding the edge up and lining it up with the socket, not really worrying about the outside edge for now. Repeat this 3 times.

We're going to repeat the previous step for the backside of the model, but only extrude twice this time. While you "can" extrude it a third time, I don't like to do that because you'll have to merge vertices, which usually changes their position. I'd much prefer to use the Append to Polygon Tool to connect the two sides.

Go ahead and use the Append to Polygon Tool twice to connect the opposite sides.

After doing so, you should have a cuirass-shaped torso. We also have a very nicely shaped socket for our arms which will be easy to work with. We will now be filling out the middle section and realigning the edges inside the model.

Strictly using the side viewport for now, adjust the inside edges of the torso to line up with the contour of the reference image. You can follow the image above for reference. There's no way for me to be specific about where to move the points, you will just have to feel it, but I suppose you can aim to have the wireframe look like it's spreading outwards. Avoid an aperture/whirlpool spiral shape.

Go ahead and take a look at the viewport screenshot so far. This is where all my vertices sit. I chose to adjust the inside vertices a bit in the X-Axis. You may attempt to make these adjustments, or just move to the next step.

Don't worry, if you didn't feel you could make the changes in the previous step, you will have the opportunity to do it again later. For now use the Append to Polygon Tool and add a quad to the front of our torso.


Via the backside, go ahead and Append to Polygon 3 more times. The two images above will illustrate. After this is done, you should now see we have a torso with a hexagon opening, which we will later use to extrude upwards and create a neck.

This is your chance to now adjust those inside vertices. Using the collar hole as a guideline, do your best to match it up with the collar in the reference image. You should also go down the connected lines and make sure the vertices create nice curves instead of being all zig-zaggedy.
The Completed Torso

With that, you should now have an image like the one above. SAVE your progress. [Inn Music] -- That was significantly more difficult than the previous tutorials because there was a lot more random tweaks and free-styling involved in the modeling process. A lot of it was in your hands and future tutorials will be the same. Unless I'm touching on something new, I expect you to be able to handle things I've previously discussed without detailed instructions. If that has been a problem, just watch the video.
In the next tutorial, I will be working on the shoulders, arms, and hands. Now my characters in particular don't have fingers, since they're low poly characters who will never need them for gesturing, I simply use mitten-type hands for holding standard weapons. If that's a problem for you, there are plenty of good finger tutorials available, or maybe I will do one in the future once this series is over.
pretty cool, a little too complicated for me though :x
ReplyDeletethis is an amazing tutorial :O
ReplyDeletethis is nice tutorial! thanks for sharing it
ReplyDeleteNice! Very detailed :D
ReplyDeleteThat is some amount of info there. Well done.
ReplyDeleteyou seem to be an expert on this, nice tutorial.
ReplyDeletewow, awesome!
ReplyDeletevery nicely done tutorial, this would have helped me a lot back when I was in high school!
ReplyDeletewhoa... how long did it take you to write?
ReplyDelete