Saturday 30 April 2011

Low Poly Tutorials Ep.2

This is the second part of a series. You may find the beginning here: Low Poly Tutorials.

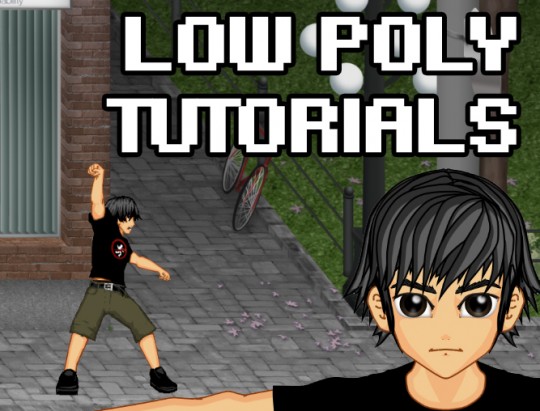
In the last episode, we discussed the conceptualization of a character and the creation of reference material for Low Polygon Modeling. In addition to Front, Side, and Back images, we planned out some preliminary geometry to help guide us through the modeling process. Many, if not most modelers, are capable of visualizing without drawing and an equal amount may not even care about how many polygons they use until it comes time to use them. You may find you are one of those people that will need to go outside of your original plan if the model requires it... and that's okay. When you create art... when you create anything (and I mean truly create it from scratch), you are the designer. It can't ever be wrong and people will be mistaken for saying otherwise. Of course if you're paying homage to something or trying to copy something else, that's another story.

Setting up Maya

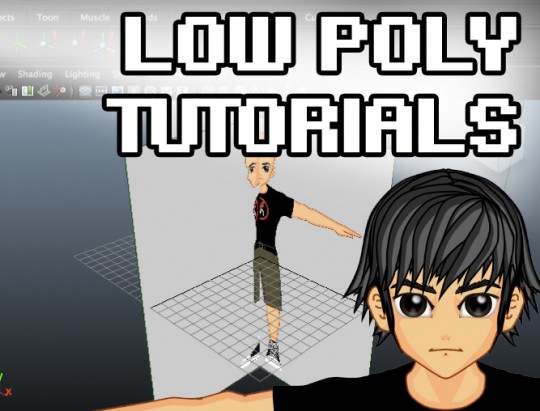
For this tutorial I am using Maya 2011. Today, if you're a student, you can get a free education version of the latest Maya, so that is definitely worth looking into. It will allow you to learn the ins-and-outs of the program and then buy a license when you're ready to produce with it.

When you first open up Maya, the first thing you should do is make sure you can see 4-views so that you can model your character from different angles. This is why we have reference images for the Front, Side (Right), and Back. Three of the viewports will be orthographic projections, being perfect 2D views of each sides with no perspective depth, while the one perspective view will be your camera for viewing the model in 3D fly mode.


When you press the button featured in the image above, it will automatically set up your 4-views for you, except you will notice that in the top-left, that panel is set to TOP instead of BACK. Since we aren't using a top image, we need to change this to Back. To do that, just click in that top-left panel to activate it and roll your mouse over the top-right corner of that panel to click the arrow as in the image to the right.

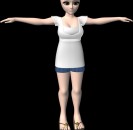
Some projects don't require a back image to model their characters, and I personally think a Top image is somewhat difficult to draw for characters. It's more appropriate for something like a car, weapon, or just the arm by itself. Flat things with less vertical complexity. Since characters can have unique backsides, it's more helpful to use a back image. I'll be honest, there are parts of the human body that require some intuition or outside viewing material. Your reference images won't help you with things you can't see from the sides like the crease in a woman's cleavage, or other such parts that curve back in and can't be shown in 2-dimensions from certain angles. Luckily we're working in low polygons, so that won't really be an issue.

Now that you have your 4-views set up properly, the back image may be zoomed out a little strangely. You can reset the zoom to encompass all objects in your scene by pressing shift-f. This is something you'll want to remember if you don't already know it. You should know it. There are many basic tutorials teaching basic navigation and object creation in Maya.


I've gone ahead and created a bald version of the reference image above. This will help us create the head and hair later on, because the hair will be built around the scalp. If you're too lazy to click and save the images individually and you have un-zip capability, you can just download them here: FINN-BALD 532KB

After you've got the above reference images, you are now ready to insert them into each viewport. Under each panel there is a mini-menu with several options to customize your viewport. You'll want to go under Views -> Image Plane -> Import Image... to import each of your images. You will have to browse to the location and select the appropriate image for each viewport. Front for Front, Back for Back, Side for Right, etc...


As you can see in the viewport, every image is overlapped in the perspective viewport (top-right), which is not what we want. We don't even want them visible in the viewport, so we will have to hide them but not before we've moved the images a bit. We have to move them to make sure they will always be sitting behind the actual model we will be making.

Each image plane is attached to a viewport camera, so you will have to open up the camera attributes to make changes to its image plane. Select the camera-attributes button by pressing the button featured in the image on the right. This will pop open a panel on the right with customizable options for the camera.

Once you're in the camera-attributes, you'll want to select the image plane tab featured in the image to the right. From here you can scroll down and adjust the image plane's Center position in the workspace. I've set its Center to -50 along the x-axis to move it so that it's sitting off behind all the objects we'll create. You can actually see this change in the perspective viewport. You will have to do something similar for each of the two other views (Front and Back). Instead of moving them -50 in the x-axis, set them to -50 in the z-axis for the Front view, and 50 in the z-axis for the Back view. The z-axis is the third box. Every object has an x, y, and z coordinate in 3D-space, so we're just making adjustments to their Center. You might have issues with an imported image being larger than the others, just make sure that the Width and Height parameters beneath the Center dimensions are all set to 30 since our image is a perfect square.


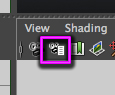
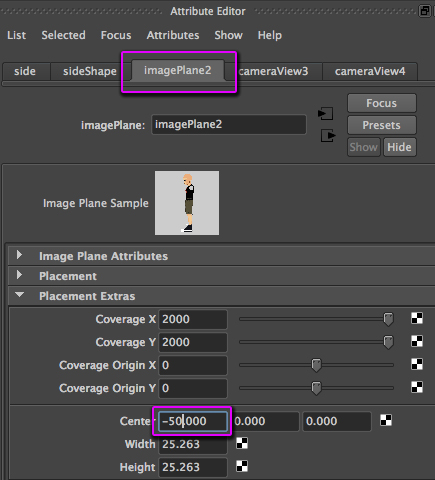
After you've shifted the Centers of all 3 orthographic views, you'll have to hide them from showing up in the other views so you don't accidentally click them, or have them interfere with your seeing the right reference image. We achieve this by going back into camera-attributes, just like before, and clicking the setting above.

Wow, we did a lot of work just now. For an expert modeler, that would have been about a minute of work. Since we're just starting out, we're just figuring out the techniques that we'll one day commit to memory (or maybe find better techniques to replace them). Since that was a lot of work, you might want to save! SAVE OFTEN when you've done a lot of important work. This is very important. Maya isn't 100% stable. If you ever do crash without having saved your progress, you will feel very bad, but fear not... in addition to preventative measures, Maya does keep working files which can restore your lost work. I won't go into the details here, but you should just be aware of this option. It may save you from a headache someday.

If you had any trouble following along, I have a mouse tracking video available in HD to view here. Next time we will begin by modeling the left leg, which we will mirror and use to create the character's right leg and shorts!

Thursday 28 April 2011

Low Poly Tutorials Ep. 1


After receiving some suggestions (via this blog's mirror on blogspot) that I provide some tutorials on low poly modeling, I said... why the heck not? Now I don't claim to be an expert on 3D or even building characters for games, but since we're focusing on Low Poly characters, I can ignore some greater lessons which I will only briefly mention here in the introduction. Things like Topology, where for more complex models that will move or transform in certain ways, proper establishment of edge loops and quad patterns will be necessary.

Typically, artists will create high resolution models in order to generate better textures for low poly models. That is probably the best approach, but not one I will teach here. These are strictly tutorials to be applied towards building a low poly model for a basic characters from scratch, so you will have to make sure you include necessary details when it comes to texturing and properly laying out your models. Another thing to note as most important when approaching pretty much everything is that there is seldom such a thing as "best practice" when it comes to technique. There's only "practice", so the best way to do anything is the way that you figure out on your own or can do fastest. Always being concerned about the best approach will only cause you to procrastinate. The sooner to start, the sooner to finish. Remember that.

Making your reference images


Knowing how to draw will be a great advantage, but don't worry if you don't. If you've been following this blog, you'd know that I've already established characters that will be used towards my new game. It was my intention to create a 2D action beat-em up with characters of very specific proportions. I initially planned on pixel drawing every model as I did in the image above, but later realized I would never finish my game in a reasonable timeframe with as many characters as I had. So we're going 3D and my personal intention is to use these as posing models for further 2D work.


The images above are two templates I created in order to base further character models upon. If you wish, you may take them and generate your own characters. I have already moved forward and generated my main character based on this template. There are several ways to do this, however, my personal favorite is to use a program like Adobe Photoshop or any other painting program. If you print these templates and draw over them by hand, you should have a ruler in order to make sure you line up several elements in all the different views. You can also google several other templates if the proportions of these characters are not to your liking.


The character above will be the one used in the following episodes of this tutorial, so don't get too enthusiastic about the characters you make yourself since you might want to follow along using this template. The details on these characters are extremely minimal, so you shouldn't have too much trouble following along.

Planning out your geometry

Here's something I like to do before starting to give myself a general idea of how the model will be made. You can use a pencil and go nuts figuring it out, but it's pretty straightforward once you get started. You'll want to work in quads or four sided shapes as often as possible. There will be times when you feel the need to use triangles, which is okay because in games it will be converted to triangles anyways, but don't go using shapes with more than 4 sides.


I like to start from the feet and limbs when possible because it's easier to plan the torso around it later. It's like something out of origami or papercraft when you think of it. You don't have to be the best artist in the world, but it helps to have an idea of how perspective drawing works. I may do a tutorial on that in the future but until then, you can just practice with it, or even get some actual paper and fold it, or you can just look at my drawings. In the crotch, I used a triangle, but I can just split that out into a quad by adding a gap, which will be better overall for leg movement. If Ieft it as a triangle, that would be some major cock pinching.


Don't take the head too seriously here, there's no good way to plan that out, especially the hair. Note that when connecting the arm to the torso, I have to split an opening in the contour. This is what you want. How else would you connect the arms? As you can see it's based on how many sides the arms need, so that's exactly why I do the limbs first. You can probably tell that while I have a grasp of drawing perspectives, I'm actually pretty bad at sketching. My lines aren't straight and I get a bit furry with them, which art teachers have been telling me not to do all my life. This is why I prefer working in computers because you can make straight lines pretty easily and correct mistakes without any erase marks. You can even make an actual square and transform it using perspective tools. All in all, this doesn't have to look good because it's only for reference.

This is a good chance for you to do some catch up in the area of concept art and planning your geometry. Next time we will dive into inserting our reference images so we can begin modeling!

Sunday 24 April 2011

Low Poly Modeling


Low Poly (for Polygon) Modeling is a technique employed by 3D artists in order to create an expression of the subject using as little detail as required, or perhaps more appropriately, the attempt to include as much detail as possible while making that expression using as few polygons/triangles as necessary.

Due to a recent decision to move forward with a project nearly 2 years in the making, the majority of time which was spent not working on it, I have begun finally putting in some manpower in order to see it be done. If you think 2 years is a long time to procrastinate, you'd be right. You should also note that the story universe in which this game project takes place was up to this point 15 years in the making. 6 Episodes long, 3 scripts written, all of which will have to be scrapped or revised now that I'm long past the 2010 year milestone.

As it was my wish to have 2D graphics, but fluid movement which could only be achieved through first tracing 3D models, I elected to transfer my character designs into 3D format for rigging and animation, just so it could once again be transformed into 2D graphics! Some might say this is counterproductive, but I doubt most people know the pains involved in animating in 2D. For reference, I once worked 15 hours a day for 3 months only to have about 2 minutes of hand drawn anime done for a short film project. I wasn't that keen on human anatomy so it's usually a grueling process in making sure my characters don't look like they have Parkinson's (don't give me a hard time, I happen to donate annually to them).

Layout down the groundwork

When I first came up with the characters for E6, I wanted them to be proportioned in this mini form factor in order to make a nod to the concept of it being an handheld game. The graphics were also pseudo 8-bit but not on the extreme side of things. I like to think it was meant to look unique enough while sitting in between oldschool and next gen. All graphics for this game were done in 1080p quality so as to give it the potential for an easy port.


Of course after finishing many animations for the main character, I soon realized I was going to have to come up with a better way of creating these character sprites. It took way too long to animate every single action and there were enough characters to make that seem daunting. I immediately stopped production on that engine and began focusing on other projects. When I finally came back and made my decision to mock up my characters based on 3D models, it was due to a game called King of Fighters XIII which had employed the same tactic.


The first plan of attack was to unify the characters according to the same proportions they were given in the original concept art. This was relatively simplified once I drew up the templates for both male and female body types. All characters would be drawn based on these proportions.


Modeling


I initially made the mistake of attempting to reproduce the characters in higher polygons. I figured since I was only tracing them, I could eliminate the need to ad-lib most of the details, but unfortunately, this attempt only ended up causing the character to lose its faithfulness to the original design. It also made it too obvious that the details were lacking, so I scrapped that and went with low polygons.

It made a huge difference. Not only was the character more primed for practical use, but it was so spot-on the concept drawing that I almost wish I hadn't spent so much time attempting the previous version. Much of the textures were taken directly from the 3-view concept art, and I feel it has maintained its charm.


Shout out to low-poly work

I love low polygon work, when done well. Many times, the hard work comes down to the creative use of textures. I'm not a huge fan of UV Mapping, which is how we get those lovely images on top of those dull gray shapes, but it's a necessity.


I didn't have the opportunity to do a character like this since mine is a lot different in terms of style and detail, but I will probably be doing more low poly work in the future now that I've put enough hours in. The intimidating beast for me at this moment is the whole rigging scene. I once put bones into a character I created and their ankles twisted in ways that was inhuman. Once that is overcome, the next step is advanced rendering techniques, which I will probably not ever get around to since these models are purely for reference.