In the last episode, we discussed the conceptualization of a character and the creation of reference material for Low Polygon Modeling. In addition to Front, Side, and Back images, we planned out some preliminary geometry to help guide us through the modeling process. Many, if not most modelers, are capable of visualizing without drawing and an equal amount may not even care about how many polygons they use until it comes time to use them. You may find you are one of those people that will need to go outside of your original plan if the model requires it... and that's okay. When you create art... when you create anything (and I mean truly create it from scratch), you are the designer. It can't ever be wrong and people will be mistaken for saying otherwise. Of course if you're paying homage to something or trying to copy something else, that's another story.
Setting up Maya
For this tutorial I am using Maya 2011. Today, if you're a student, you can get a free education version of the latest Maya, so that is definitely worth looking into. It will allow you to learn the ins-and-outs of the program and then buy a license when you're ready to produce with it.When you first open up Maya, the first thing you should do is make sure you can see 4-views so that you can model your character from different angles. This is why we have reference images for the Front, Side (Right), and Back. Three of the viewports will be orthographic projections, being perfect 2D views of each sides with no perspective depth, while the one perspective view will be your camera for viewing the model in 3D fly mode.
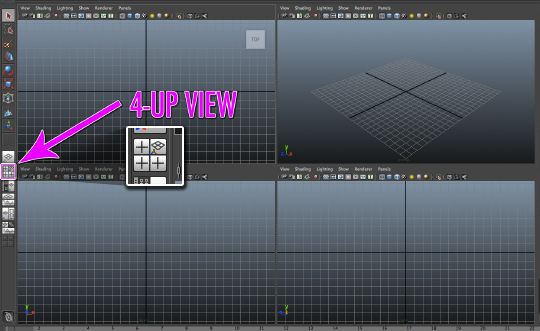
When you press the button featured in the image above, it will automatically set up your 4-views for you, except you will notice that in the top-left, that panel is set to TOP instead of BACK. Since we aren't using a top image, we need to change this to Back. To do that, just click in that top-left panel to activate it and roll your mouse over the top-right corner of that panel to click the arrow as in the image to the right.
Some projects don't require a back image to model their characters, and I personally think a Top image is somewhat difficult to draw for characters. It's more appropriate for something like a car, weapon, or just the arm by itself. Flat things with less vertical complexity. Since characters can have unique backsides, it's more helpful to use a back image. I'll be honest, there are parts of the human body that require some intuition or outside viewing material. Your reference images won't help you with things you can't see from the sides like the crease in a woman's cleavage, or other such parts that curve back in and can't be shown in 2-dimensions from certain angles. Luckily we're working in low polygons, so that won't really be an issue.
Now that you have your 4-views set up properly, the back image may be zoomed out a little strangely. You can reset the zoom to encompass all objects in your scene by pressing shift-f. This is something you'll want to remember if you don't already know it. You should know it. There are many basic tutorials teaching basic navigation and object creation in Maya.
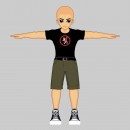
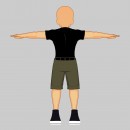
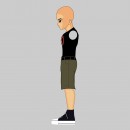
I've gone ahead and created a bald version of the reference image above. This will help us create the head and hair later on, because the hair will be built around the scalp. If you're too lazy to click and save the images individually and you have un-zip capability, you can just download them here: FINN-BALD 532KB
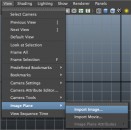
After you've got the above reference images, you are now ready to insert them into each viewport. Under each panel there is a mini-menu with several options to customize your viewport. You'll want to go under Views -> Image Plane -> Import Image... to import each of your images. You will have to browse to the location and select the appropriate image for each viewport. Front for Front, Back for Back, Side for Right, etc...
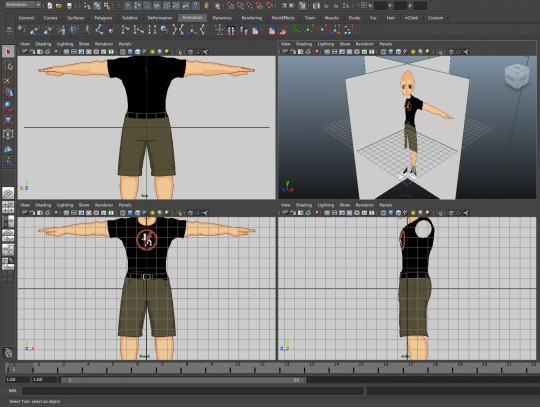
As you can see in the viewport, every image is overlapped in the perspective viewport (top-right), which is not what we want. We don't even want them visible in the viewport, so we will have to hide them but not before we've moved the images a bit. We have to move them to make sure they will always be sitting behind the actual model we will be making.
Each image plane is attached to a viewport camera, so you will have to open up the camera attributes to make changes to its image plane. Select the camera-attributes button by pressing the button featured in the image on the right. This will pop open a panel on the right with customizable options for the camera.
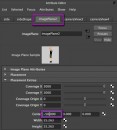
Once you're in the camera-attributes, you'll want to select the image plane tab featured in the image to the right. From here you can scroll down and adjust the image plane's Center position in the workspace. I've set its Center to -50 along the x-axis to move it so that it's sitting off behind all the objects we'll create. You can actually see this change in the perspective viewport. You will have to do something similar for each of the two other views (Front and Back). Instead of moving them -50 in the x-axis, set them to -50 in the z-axis for the Front view, and 50 in the z-axis for the Back view. The z-axis is the third box. Every object has an x, y, and z coordinate in 3D-space, so we're just making adjustments to their Center. You might have issues with an imported image being larger than the others, just make sure that the Width and Height parameters beneath the Center dimensions are all set to 30 since our image is a perfect square.

After you've shifted the Centers of all 3 orthographic views, you'll have to hide them from showing up in the other views so you don't accidentally click them, or have them interfere with your seeing the right reference image. We achieve this by going back into camera-attributes, just like before, and clicking the setting above.
Wow, we did a lot of work just now. For an expert modeler, that would have been about a minute of work. Since we're just starting out, we're just figuring out the techniques that we'll one day commit to memory (or maybe find better techniques to replace them). Since that was a lot of work, you might want to save! SAVE OFTEN when you've done a lot of important work. This is very important. Maya isn't 100% stable. If you ever do crash without having saved your progress, you will feel very bad, but fear not... in addition to preventative measures, Maya does keep working files which can restore your lost work. I won't go into the details here, but you should just be aware of this option. It may save you from a headache someday.
If you had any trouble following along, I have a mouse tracking video available in HD to view here. Next time we will begin by modeling the left leg, which we will mirror and use to create the character's right leg and shorts!


I havent used any 3d program since lightwave
ReplyDeletePlaying with Maya now! :D Thanks!
ReplyDeleteThis is actually pretty good to get started in Maya!
ReplyDeleteGood to have this in case I ever decide to use maya, thanks.
ReplyDeleteIt's always fascinating to see how things are made.
ReplyDeleteIt's funny, because it seems like when someone is really passionate about something, you can always tell - by the way you write, I would definitely say that you really care about this stuff.
ReplyDeletei have autodesk maya but i been putting it off i really should start learning more about it
ReplyDeleteIm more of a 3ds max type..
ReplyDeleteYeah like dgr said, I've also been putting it off but I feel that both of these tutorials will help me out. I will be looking into getting Maya and experimenting for sure!
ReplyDeletenice post
ReplyDeletefollowed
http://incredible-mo.blogspot.com/
This is really awesome. I can't wait to try it.
ReplyDeleteHey guys, if you use 3DS Max, that's cool too. It's really all about practicing to increase your skill level and learning to use the tool that gets it done.
ReplyDeleteI used 3DS Max from version 3.x to 7 but switched to Maya a few years ago because, I felt some of the way things worked and named made a bit more sense to me, like the texture/materials editor and the mel scripting made things seem more expandable. Also I was interested in animation more than games. Today there's really no limitation, just preference.
Everyone should really try both and see what's best for them. There are also alternatives like Cinema4D, and some people might even like a sculpting approach like in Z-Brush. Blender is also popular as a free 3D program.
thanks for sharing! pretty useful!
ReplyDelete